Photoshop is a vast program, packed with all kinds of sophisticated tools and functions to keep the professional photography world turning. Whatever your level of experience with the software, though, there are some quick and easy tips you can take advantage of to improve your Photoshop experience—here are some of our favorite ones.
1) Rotate the view, not the image
You might want to use a different angle for retouching, but you don’t have to rotate the image itself: press R (or click-and-hold on the Hand Tool icon) to find the Rotate View Tool, which then lets you spin the picture around on screen without rotating the actual image.
2) Edit multiple text layers together
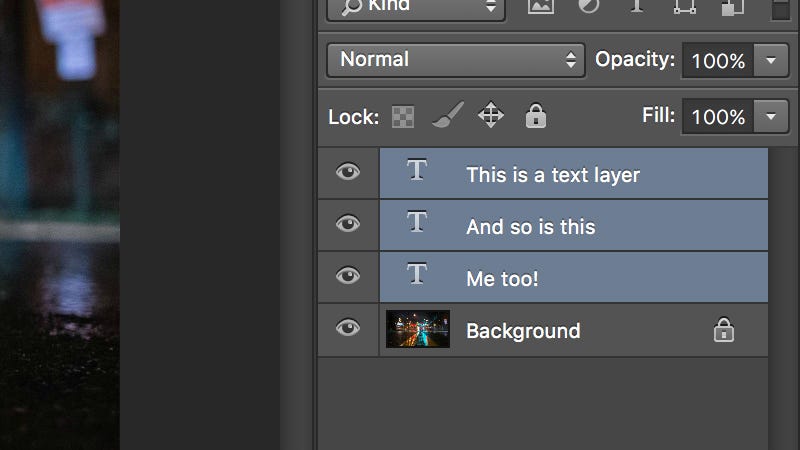
You don’t necessarily need to edit each text layer individually if you’re making the same changes to all of them. For example, hold down Ctrl or Cmd when selecting the text layers from the Layers window to snag multiple ones, then make your changes via the toolbar.

3) Size and move selections
Photoshop is packed with all manner of keyboard shortcuts that extend its features in some way. Here’s one example: when dragging out a selection window, hold down Space to move the selection as well without releasing the mouse button.
4) View one layer on its own
Here’s another shortcut that can save you lots of time: If you need to see one layer on its own, there’s no need to uncheck all the other eye icons. Instead, hold down Alt and click the eye icon on the layer you do want to see (and click it again to go back).
5) Drag selections between tabs
If you need to move a selected part of a picture into another image, and your files are open in tabs, there’s an easy and intuitive way to do it. Drag the selection as normal (using the Move Tool) up to the tab of the other picture, then wait a second for it to appear.
6) Make use of paste in place
When you paste in a new layer, it goes in the center of the current image or selection by default, but you can get around this by using the Shift button as well as Ctrl+V (Cmd+V on a Mac). This retains the selection’s original position and it works between images.
7) Save files up to 20x faster
From Preferences, choose File Handling then check the Disable Compression of PSD and PSB Files box. Your layered files will no longer be compressed—and take up substantially more room on disk—but saving them will be significantly quicker.
8) Use the Magnetic Pen Tool
The Magnetic Lasso Tool is useful for automatically finding color boundaries when you’re making selections, but you can turn the Freeform Pen Tool magnetic as well to make it easier to draw shapes. With the tool active, just check the Magnetic option on the toolbar.
9) Quickly straighten an image
Use the Ruler Tool (hidden behind the Eyedropper Tool) then drag out a line across the horizon or another reference point that should be horizontally or vertically straight. Then pick Image, Image Rotation and Arbitrary, and Photoshop picks the required value.
10) Remove fringes on cut-out objects
When you cut and paste something into an existing image, you might (depending on your selection) see a colored fringe of pixels around it. Don’t panic—use the Matting option on the Layer menu to access several tools to help you clean up these pixels.
11) Dehaze landscape photos
Here’s a very useful new feature added in the most recent Photoshop update. Choose Filter then Camera Raw Filter, open up the Effects panel and there’s now a Dehaze slider that reduces the haze effect you get when shooting sweeping landscape shots.
12) Add blurs without losing realism
This is another recently added feature for Photoshop CC users: adding grain at the same time as a blur to make photos look more realistic. Choose any option from the Filter, Blur Gallery list, and there’s a new Noise tab to the right that you can make use of.
13) Insert dummy text
Many people use Photoshop to mock up layouts for websites and the printed page, and if you need to fill in an area with some dummy text then you don’t need to tire out your fingers typing it—just choose Paste Lorem Ipsum from the Type menu instead.
14) Quickly export individual layers
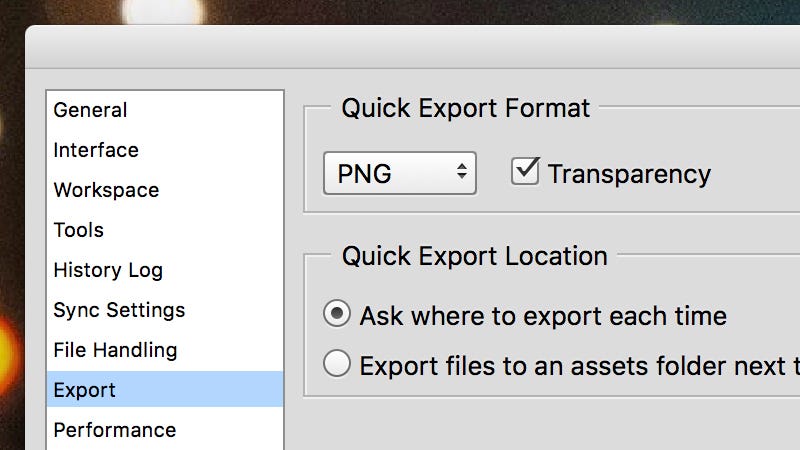
Photoshop offers a wealth of export options, and if you need to quickly export individual layers from a project without saving it all you can do this with a right-click or Cmd+click on the layers panel. Use the Preferences, Exportoption to set the quick export format.
15) Use any image as a brush
Open the Edit menu, then pick Define Brush Preset to use the current image (or selection) as a brush. White areas in the source image count as transparent and black areas are where the virtual ink will hit the virtual canvas, so tweak the picture accordingly.
16) Cycle between fonts
Photoshop doesn’t have the most user-friendly text editing interface, but this quick tip can make life easier: with some text selected inside a layer, click on the font selection drop-down list on the toolbar, then use the up and down cursor keys to preview each font.
17) Get more undos
Ctrl+Z undoes the last action (Cmd+Z on a Mac) but you can hold down Alt as well to go back extra steps. Set the undo limit through Preferences and Performance (under History States), though the higher you go, the more system resources the program needs.
18) Be more precise with brushes
If you’ve got some precise editing to do, then the virtual brush tips Photoshop uses by default can obscure whatever it is you’re painting on (especially at larger sizes). Switch to a crosshair instead by going to Preferences then Cursors and changing the configuration.


No comments:
Post a Comment